This blog will document my Fender-Style Showman Tone Ring Amp Cabinet build.
Background
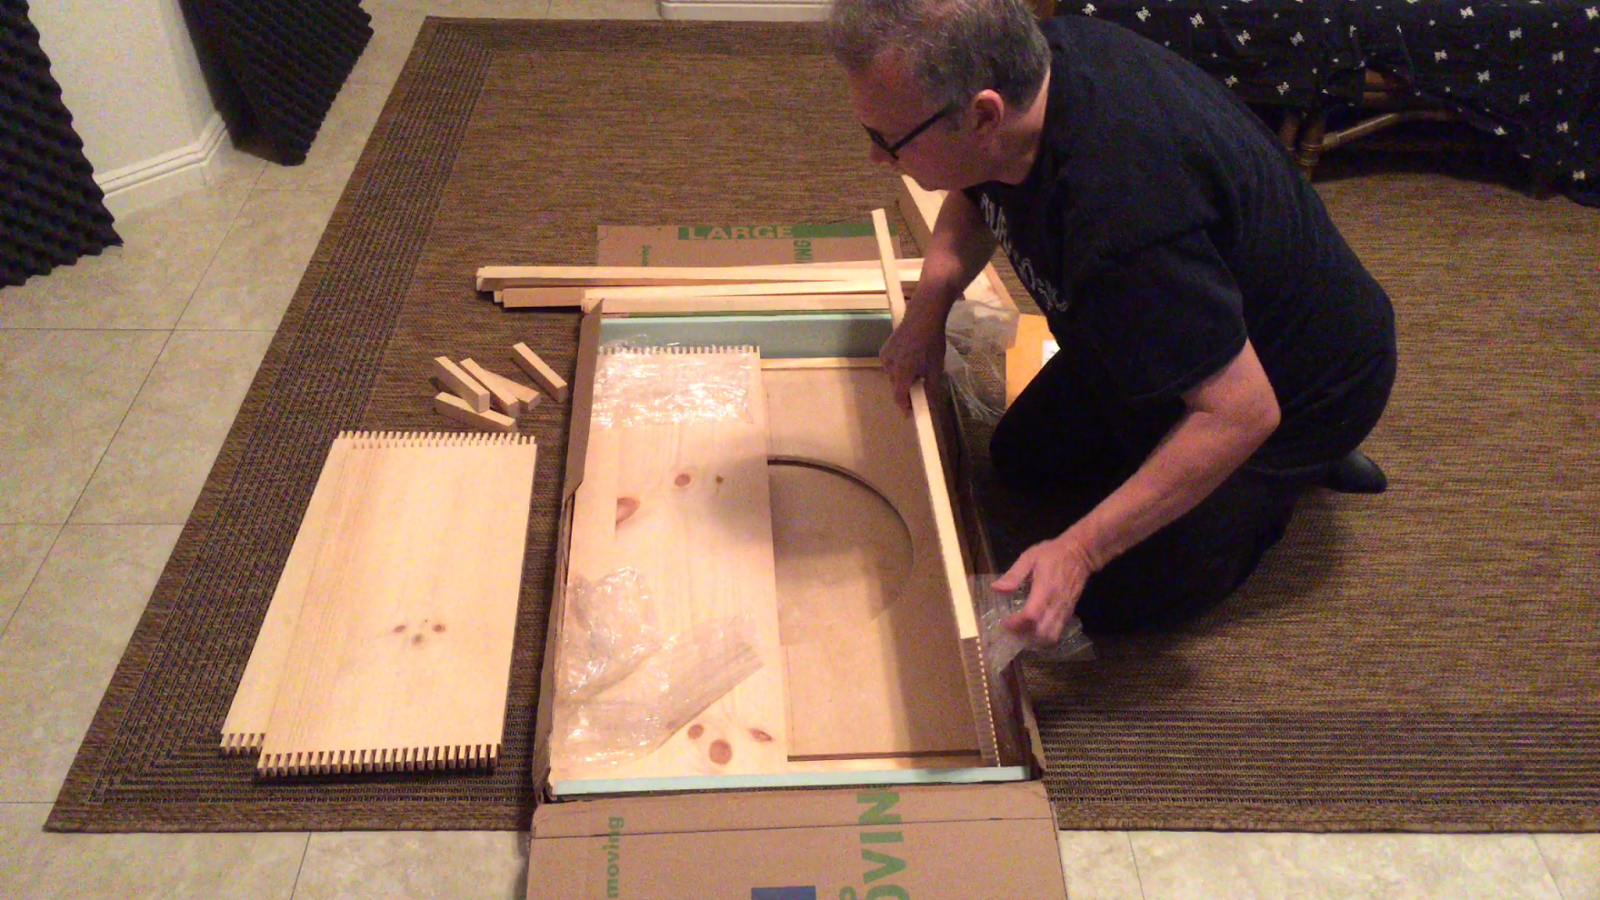
I purchased a 63 Blonde Fender Showman head and I was looking for a matching tone-ring cabinet. Exactly one cabinet came up during the past 6 months. An original 63 cab but with a replaced speaker (Jensen instead of a JBL D-130F that would have been stock). The owner wanted $1500 for it. I'm sure that's a great price for someone but not for a cheapskate like me. I thought about buying a Blackface tone-ring cab and just recovering it but I decided against that as those prices are starting to go up as well. So I decided to build one. Heck, I'm a DIY type of person. How hard could it be. After pricing out materials (and the tools I'd need to make it look half-way decent), I realized it's going to still cost a bit of money. I found an eBay listing for the wood pieces in kit form. Perfect! I won't have to deal with purchasing any wood plus trying to get it home in the trunk of my car (plus trying to cut it without a table saw...). It was offered by Paul W from Soultone Music. I ordered the kit and here we go.
Tone Ring History
First off, I have no first hand authority about the history of this cabinet. Everything here was gleamed from the Internet so take that with however much salt as you need. Please correct me if I'm wrong.
The Tone Ring cabinet is an amazing design. The legend goes that people kept blowing speakers in the early Showman amps (powerful amp with underpowered speakers have a tendency to do that) so Fender had the idea for the Tone Ring cabinet. It's a ported cabinet designed to produce more bass. This would allow the user to reduce the bass control thus not working the speaker as hard but yet producing the same perceived amount of bass.
The cabinet was short lived as it was costly and time consuming to build. Fender, always looking for the most cost effective route, discontinued it and replaced it with the equally great sounding (yet insanely heavier) two 15" cabinet. Oh, don't get me wrong, the 15" tone ring cab with a JBL D-130F speaker is a heavy cabinet to start with.
Design
The basic design is to mount the speaker to a metal ring and mount that ring to a baffle. Spacers and attached and then mounted to a second baffle. This creates a bass port without unsightly holes. When building a version of the cabinet, there are three basic parts. The cabinet, the front baffle assembly and the rear panel.

My Build
Paul did an amazing job of packing and it survived a cross-country journey at the hands of UPS.


The side with the extra strip added goes INSIDE. It's not a riser for the grill cloth. Fender just used a strip of felt around the opening. Look at some pics online.
To start the build, I laid out the pieces and did a dry fit. I then started marking everything. Center lines, glue lines, hole guides, etc. Since I don't have a jig like Fender had, I need to mark everything.


Once I was happy with the way things looked, I started assembling the front baffle. I glued & screwed the internal baffle to the stand offs. I then spray painted both pieces flat black. After everything was dry, I glued and screwed the two baffle pieces together. This was set aside while grill cloth and the actual tone ring were on order.


I then drilled the back panel holes and attached the stiffeners. No need to paint this as the back will be covered by blonde tolex.


I marked and drilled holes for the front cleats.

I moved to Las Vegas two years ago and left a lot of my tools back in Chicago. I had to buy some tools for this build. 30" Bar clamps and a 15' strap clamp where all pretty cheap on eBay. After the bar clamps and strap clamp arrived, I started working on the cabinet. It was tricky getting all four edges glued and attached. Once I was able to get it under control, I made sure it was square. I clamped it and set it aside. After a few hours, I stated to glue the cleats. I'll drill and screw them down after the glue sets. I'm also waiting to screw down the back cleats because I want to see where the back panel screws land. I don't want to run screw into screw.


Here's a pic of the half-way complete cabinet assembled.

Looking pretty spiffy!
There is one thing I noticed is that both baffles needed help fitting into the cabinet. I must have used too much hammer when glueing the cabinet together. There should be all kinds of room between the baffles and the cabinet. I still need to put grill cloth on the front baffle, tolex on the back baffle and tolex on the cab itself. All those small measurements add up and if I can barely fit the bafflers now, it for sure won't fit with the other stuff added. Looks like I need to reduce the size of the baffles. I guess it's time to hit Craigslist and look for a table saw. Maybe I'll try sanding the long edges first (the short edges look to have enough room). Hmmm...
Tone Ring Itself
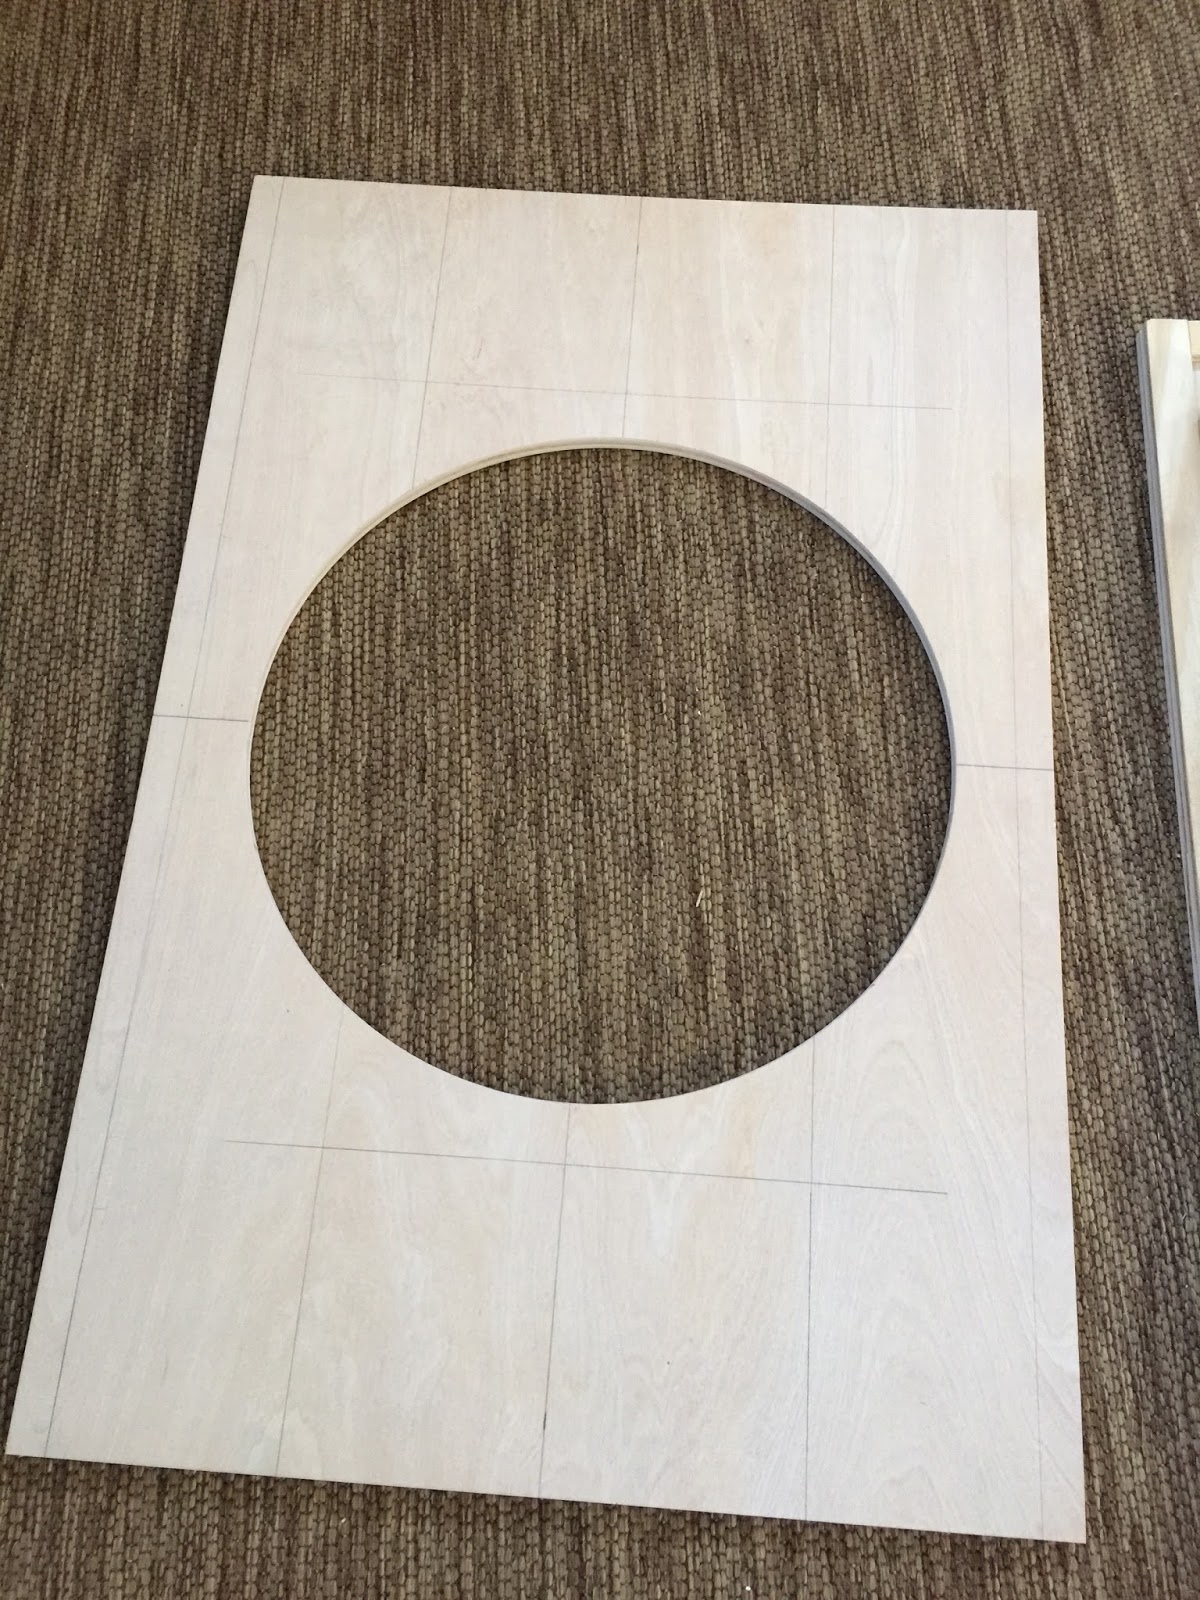
My repro tone ring came in the mail and here's a dry fit on the front baffle.


Looking good!
One thing I noticed is that the two sets of holes in the tone ring (outside ring and inside ring) don't line up. So I get a choice of having the screws on the inside baffle line up to the center marks or have the speaker screws line up on the outside baffle. It's very insignificant and, actually, doesn't really matter since one is inside and the other will be covered by grill cloth but I really want to have this look professional. Oh well.
BTW, I decided that the outside speaker screws should line up.
Now to figure out how to mount the ring. I was told Fender used metal screws to mount it to the inside baffle but all the pics I see online of vintage cabinets show machine screws with washers and nuts. The washer/nut method makes it pretty much impossible to remove the ring once the grill cloth goes on so someone mentioned T-Nuts. I like that approach but I don't know if I want to do all 16 like that. I'm leaning for a combination of t-nuts and metal screws. The same issue comes up with mounting the speaker to the ring. Maybe I should epoxy screws to the ring so they don't spin if I want to remove/change the speaker. Hmmm. I'll deal with that in a few weeks once my JBL arrives.

Issues
So it looks like I have some other issues (other than the as noted shrinking cabinet). It appears I'm not square. I guess I didn't hit one side hard enough with a hammer. I'm a bit askew.


Damn.
Also, I was reminded that the screw hole distance from the edge on the back panel is 5/16. NOT 5/8 like I drilled. Doh!

Looks like I need to plug and re-drill. At least it was caught before the tole was applied. I marked the new 5/16" line and the new hole locations.
And finally, one of the rear cleats slid out a bit while I was gluing & clamping. This one is easy. I'll just shave the cleat a bit so I have a flush fit.


Well, as I said in the beginning, I'm not a woodworker. I am learning a TON from this project, though.
I decided I'm not going to put kick-back legs on it so I won't have to drill holes in the sides. Well, right now I won't have to...
Left To Do
Add 7/8" black felt in a square around the speaker hole in the front baffle then apply the wheat grill cloth.
Paint the screw heads in the front baffle black.
Epoxy screws to the tone-ring.
Drill & Mount T-Nuts to the inside front baffle to mount the tone-ring.
Mount the JBL to the ring and wire it to the jack.
Purchase insulation and install in the cabinet.
Assemble the entire cabinet.
Add sphinx glides to bottom.
Updated 02/20/16
Nice looking work! I know it didn't turn out quite as perfect as you had wanted; but it sure seems to look usable. To me, the hard part is cutting out and gluing the Tolex. Thanks for putting this up ... always better to watch someone else struggle! God bless!
ReplyDeleteHow’s much was the total cost of the build? Minus the speaker
ReplyDeleteVERY professional................ non-square cab, wrong baffle screw holes, wrong screw hole depths. No thanks. I'll get a Mather cab!
ReplyDelete